Welcome!

This is my place to share my creative bits and pieces. My art has no rules, no limits and absolutely no order. My projects change with my moods but for the last few years, my main focus has been paper art. Cards, collage, mixed media and as many techniques as I can get to. My inspiration comes from everywhere.

I hope you enjoy your visit.


Monday, December 31, 2012

LAST POSTS FOR 2012

I almost missed this- the last Colour Q of the year!
 
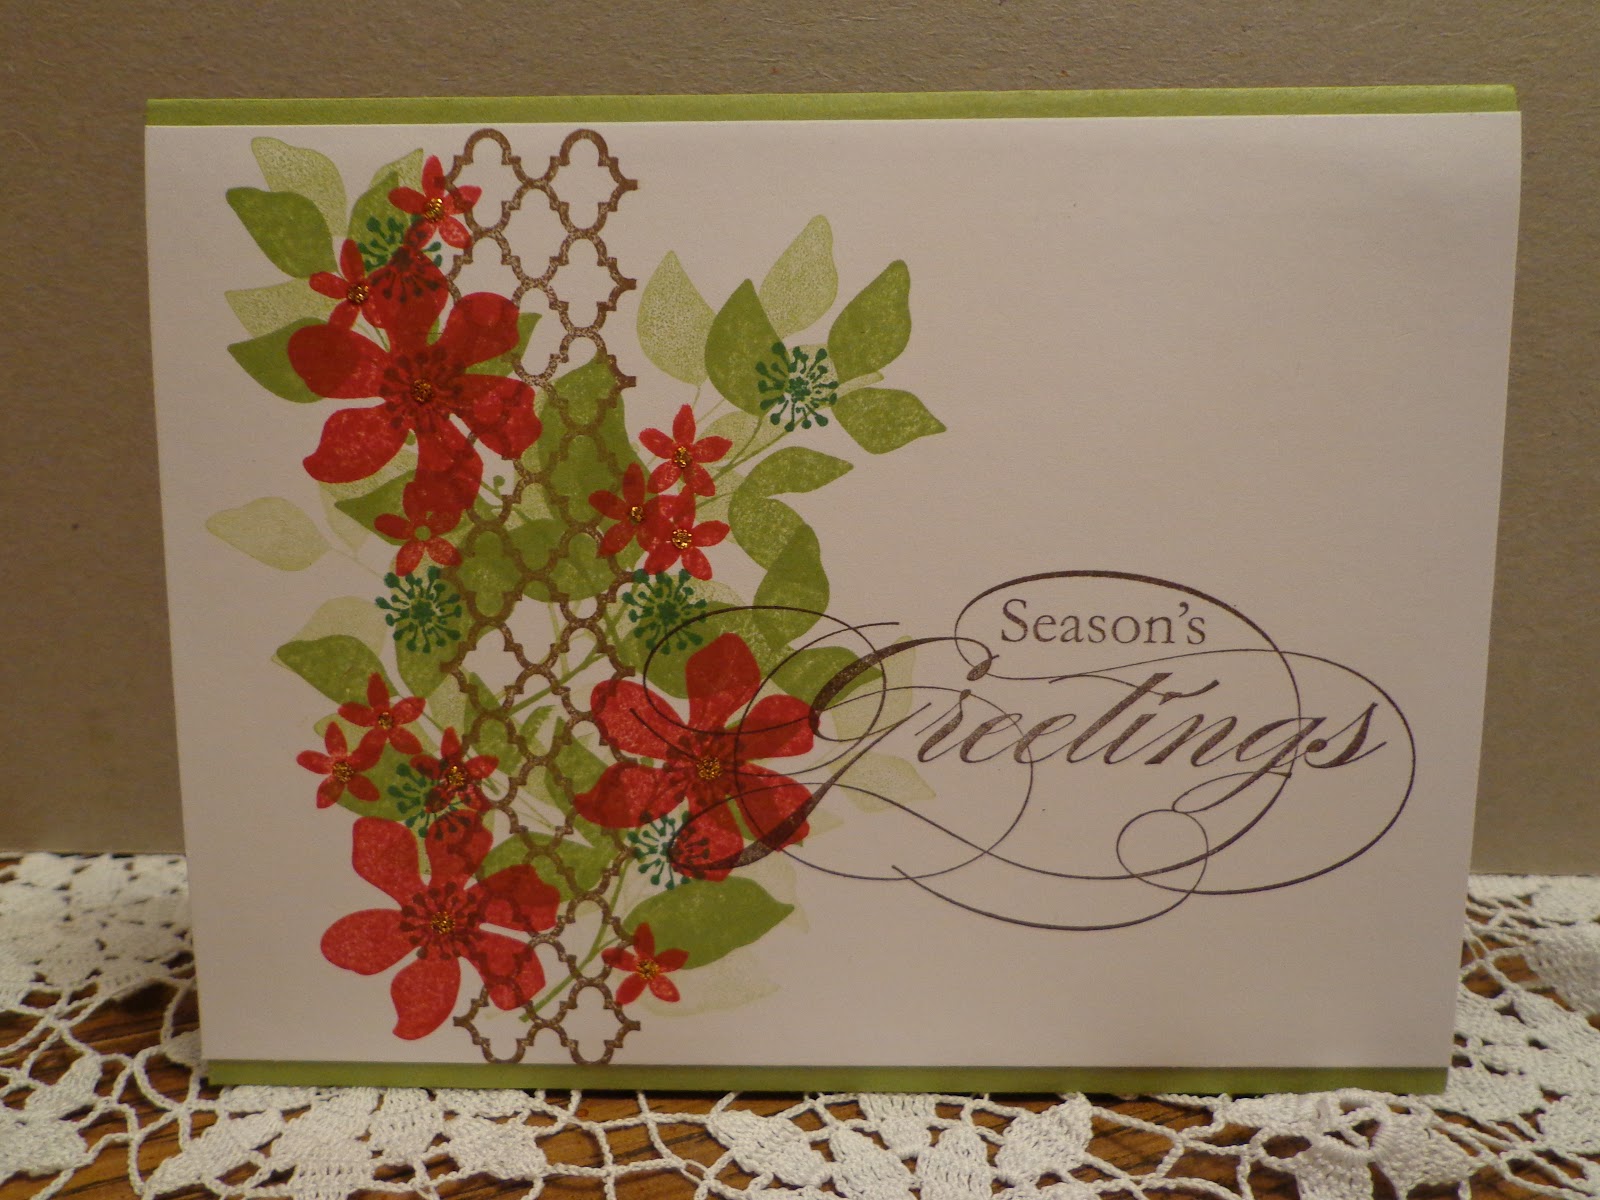
The Quietfire Design sentiment works because I have been looking back over the year and thinking of you. Thinking of your lovely comments or the fact that you come to look at all. I am grateful for your visits to my blog. I hope 2013 will be a year filled with all good stuff for you and yours.
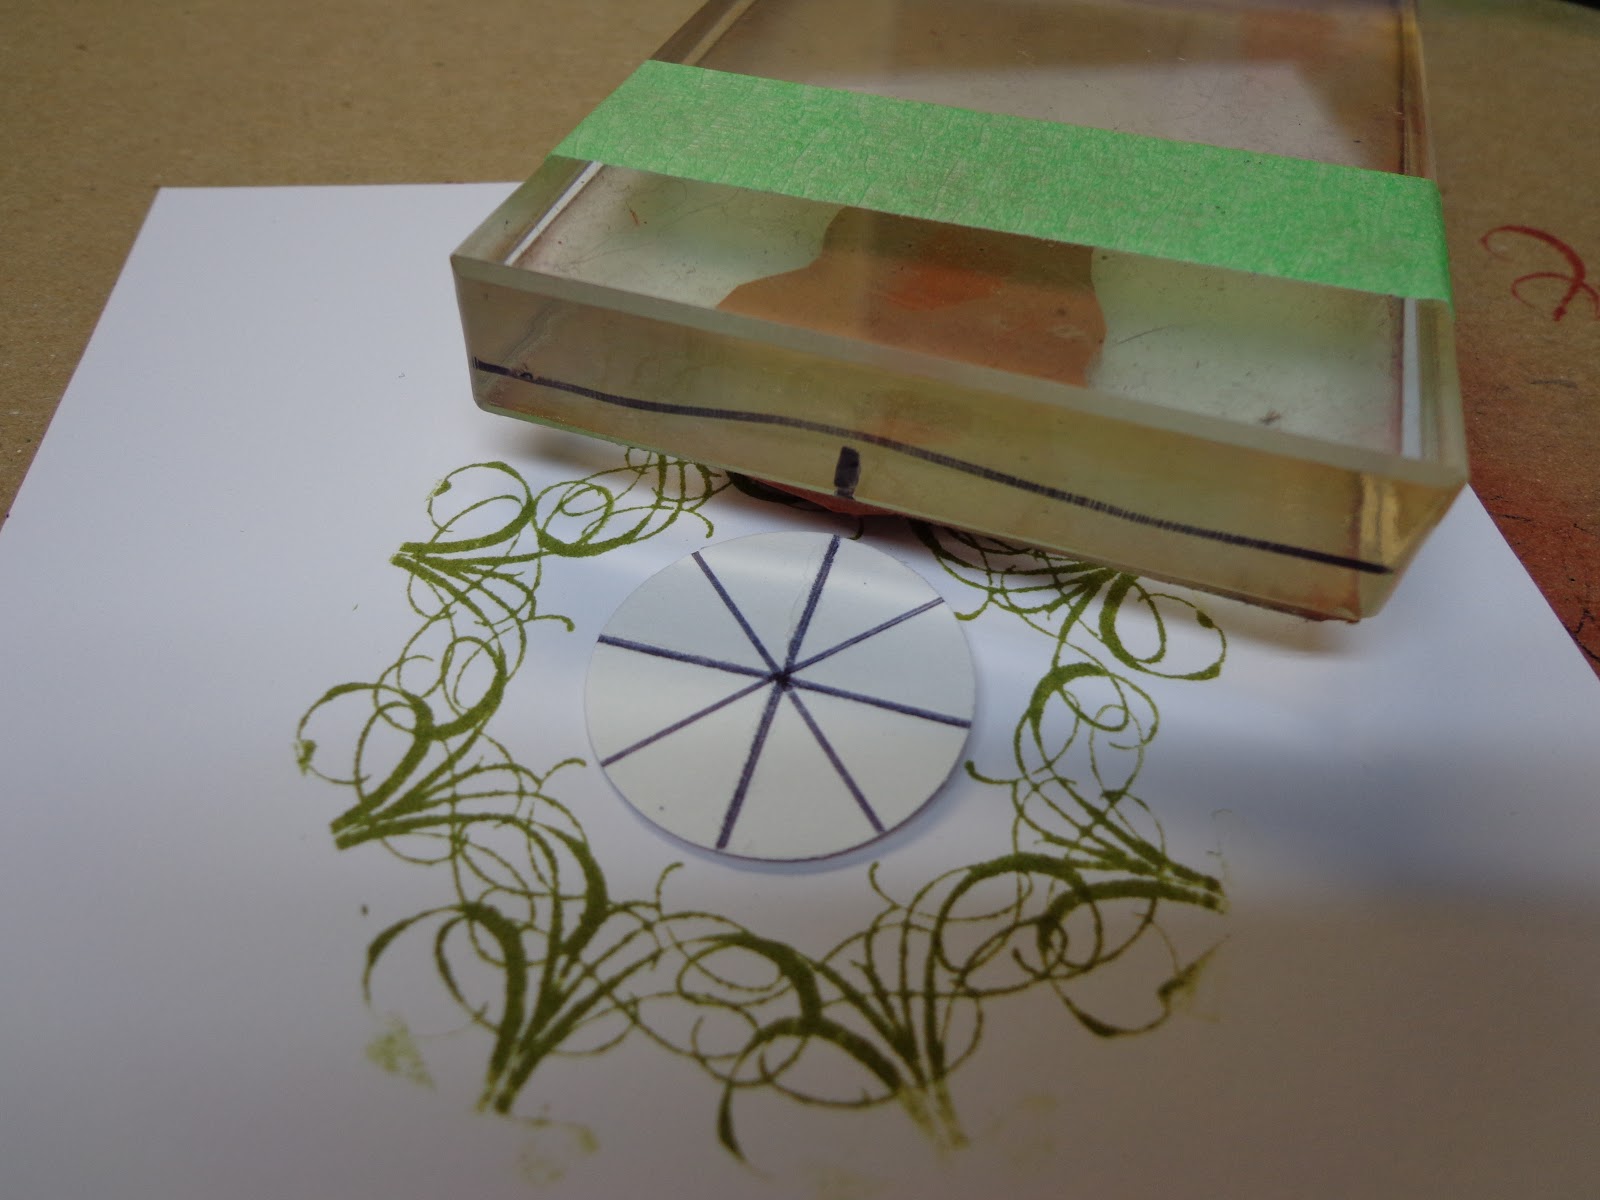
The background for this card was made by smudging the Pear Pizzazz and Bermuda Bay ink pads on my craft sheet. I spritzed the inks with shimmer spray before I pressed the glossy card stock onto it. You can see the shimmer! I dried the card stock and saw how the inks had blended to form a different colour so I repeated the process, one ink colour at a time. Then I stamped my hand carved stamp using the Pear Pizzazz. Once dry, I stamped the sentiment using Basic gray, then used my Stamp-a-ma-jig to stamp next to it with Bermuda Bay.
The rest is embossing and die-cuts, and a few dots of shimmer white frost ink.
Over at Quietfire Creations you can check out my last post for Quietfire Design for 2012.
 
Thanks for looking and
HAPPY NEW YEAR!


Thursday, December 27, 2012

SNOWFLAKES FOR SANDY HOOK KIDS

My post today has photos of one of the snowflakes I will be sending for the students of Sandy Hook school, in Newtown CT.
This the flip side of it.
This is just a glittery close-up. These photos are not important, the information that goes with them is.
Please look at the following website and if you are moved to do so, join me in sending a snowflake ( or many snowflakes) for the kids school.
This is not me challenging you to do this. I'm just trying to share information that was shared with me. Thanks Monica!
 
This is a busy time but there is still enough to do this if you decide to.
Please feel free to share this with others- the more the better!
 
Thanks for looking today. Be blessed.


Saturday, December 15, 2012

TAGGING TIME

For many years, we purchased tags to put on our gifts and had to write very small to fit on the to/from information. When I really got going with the card making, I added tag making as well. Here are the ones we're using this year. They have lots of room for writing on!
All these tags took a little time to make but a lot of the colouring was done while watching tv. I wish I could say it was a Christmas movie but I seem to recall X-men or something. Yes, really.
This last photo shows my favourites. They have lots of room, were very quick to make and have a contemporary look of banners.
I hope you're enjoying the season, however you spend it.
 
Thanks for looking today!


Friday, December 14, 2012

CHECK IT OUT!

Hi! I've posted today at Quietfire Creations. I invite you to go have a look.
 
See you next time!

Thursday, December 13, 2012

EMBEDDED EMBOSSED MITTENS

When I changed a card awhile ago, I was left with the strip of mittens I'd trimmed off. After stamping a few festive words in equally festive colours, I glued the mittens to the edge of the card stock. Then I embossed it and attached it to a card base. Looks a little windy!
The stamps are all from Quietfire Design and on special-go get some!
 
Thanks for looking today!
 

Thursday, December 6, 2012

STENCIL & PUNCH & DIE....OH MY!

Once again, I am pleased with simplicity. This card began with a scrap on my work table.
The top layer, before I stamped it with the sentiment, was a piece I'd put aside after flipping my stencil onto it. Whenever I stencil, after using it on my project I like to lightly mist it and flip it onto cardstock to print the negative. The print here is subtle because the colours used were so pale. The piece was stamped then trimmed and the corners were punched.
This was layered onto the dark die-cut square, which was then adhered to the card base.
 
Quietfire Design has Christmas goodies on sale!
 
Thanks for stopping by and I hope your day is FABULOUS!

Tuesday, December 4, 2012

HOLLY JOLLY RIBBONS

Is it any surprise that the technique used here is called "ribbon tabbed borders"?
So simple to create, and so striking. I repeated the ribbons down the side but I also could have used all different ribbons, as long as the colours matched the card. I could have added some white too. The only rule I imagine would be to match the colours in the card.
I really like the look of the looped/folded ribbon but have seen it done with cut flat pieces and that looks good too. Now, we have another way to use up those ribbon scraps. yay!
Here's a closer look at the stamped holly. I used the rock 'n roll technique to ink up the stamp -apply lighter colour to stamp, then tilt it so only the edges pick up darker ink. The veins were painted on with a fine brush and the darker ink.
 
The stamps, Distress inks and embossing folder can all be found at Quietfire Design.
 
Thanks for looking today!
 

Sunday, December 2, 2012

MERRY CHRISTMAS SNOWFLAKE

One of my favourite things about the new Snowflakes are the Buttterflies stamp set from Quietfire Design is the snowflake Merry and Christmas stamps. They go together perfectly to create a very delicate and pretty snowflake.
This card has a circle stamped background. So easy peasy and you make it exactly as it sounds. My circle stamp is a die-cut fun foam stamp and it works great with Distress Inks.
You can see the light spritz of shimmer spray in this close-up.
Here is a card I previously posted using the same circle background technique, done the same way with the same fun foam stamp.


Thank you for stopping by!


Thursday, November 29, 2012

IT'S A PROCESS...and a MOOD!

Crazy title for this post? Yes, but it fits. This morning as I looked over my work table, I saw bits and pieces and thought I had a good plan for putting them together. Awhile later, this card is the result. While I love each of the stamps, (Quietfire Design) I wasn't sure this worked. I was going for the 'family' theme and relating it to the row of mittens, similar to the family stockings on Christmas Eve. I think, it works better if you know that but this is not a talking card and the receiver wouldn't know that. So.....
I messed about created some more and made this card.
I like it more than the first one. Here's a look at the shimmer on the dots...
Super Sparkle acrylic paint is my 'go to' for shimmer. To tint it, I first applied the Fired Brick ink pad to a corner of my acrylic stamping block. Then I picked up a drop of Super Sparkle with my stylus, mixed it in with the ink on the block, then dotted it onto the card stock. If I had the ink in a re-inker, I would have used a little drop of that to mix with the Super Sparkle, but I don't so this works. I can make the shimmer paint any colour that I have in inks.
Tomorrow, I may look again and prefer the first card-never know what mood will strike or when :)
It certainly keeps things interesting.
 
Thank you for looking and I hope you're enjoying the day.


Tuesday, November 27, 2012

SNOWFLAKES

I have snowflake stamps and distress inks and sparkly spritz- and couldn't be happier about it!
Quietfire Design has just released a new stamp set and it's gorgeous. This card shows only two of the six stamps in the set. If you look at Quietfire Creations on Wednesday, you'll see a little more of it.
 
This card uses a technique called Distressed Spritz. Distress Inks are sponged onto the cardstock, then a Lace Border stencil was placed along the bottom edge and shimmer mist was sprayed over it. As it dries, the ink fades where it was wet, leaving a mottled, distressed look. The snowflake stamp was lightly sprayed with water and stamped a couple times. The rest of the card was completed, then spritzed with a little more shimmer spray.
 
Winter/Christmas/Holiday cards are so  much fun to glitz up.
What's your favourite for bringing on the shine?
 
Thank you for stopping by and have a wonderfully creative day!

Sunday, November 25, 2012

DEEP PURPLE DAZZLE

How much bling can you put on one ornament? Apparently- lots!
These take time and make a glittery mess but are so worth it.
Hard to photograph and so much richer looking in real life.
 
 
Thank you for looking!


Friday, November 23, 2012

CHRISTMAS SHINE

My card today is subtle with some shine. I love this quote- the words are perfect, the calligraphy is beautiful. You can get it too at Quietfire Design.
After stamping, I die-cut around it, then sponged the edge with Distress ink. I die-cut white card stock so I could split that piece and mat behind the stamped piece. The snowflake was die-cut, assembled with foam tape between the layers and painted with Super Sparkle.
Distress ink was sponged all around the outside edge, then more Super Sparkle was dotted onto the center of the scrolls on the design paper.
Here's a little close-up so you can really see the shine.
 
Quietfire Design has a great sale on now- go see!
 
Thanks for stopping by and have a wonderful day!


Tuesday, November 20, 2012

A CHRISTMAS BUNCH

The fake snow was flying along with the ink and stamps over the weekend. A few hours, some snacks and lots of laughs and we all built up our Christmas card stash.


Spending time with friends and flexing some creative muscle. Does it get any better?
 
Thank you for looking!


Friday, November 16, 2012

COLOUR Q DEJA VU

Once again, a fabulous colour combo from Colour Q!
If you think you've seen something like this before on my blog, you'd be right. I liked the design and technique so much I decided to use it again. I added a bit of paper piercing to this one. The beautiful flourish and the sentiment are from Quietfire Design.
 
I hope you have a fantastic day and thank you for stopping by!


Monday, November 12, 2012

A CARD & A PEEK

The snow has arrived. I like how it brightens up a grey day. Speaking of bright, this card full  of ornaments has bright splashes of colour and shine. After embossing, a lot of chalk was applied to deepen the colour. A layer of Crystal Effects was added to each ornament shape and a silver gel pen coloured in the hangers and edged the oval. The 'noel' stamp from Textured Holiday Words from Quietfire Design was stamped, punched out and attached with foam tape. A little bling and done!
 
Now, here's a little peek for you.
 
CLICK HERE to see the full project at Quietfire Creations.
 I hope you enjoy it and have a wonderful day!
 
Thanks for stopping by!

Friday, November 9, 2012

COLOUR Q #162 & QF TAG ORNAMENT

Colour Q time again and the colour palette never disappoints. For some reason, I decided to layer-lots. The opposite of the one layer cards I've been doing lately. :)
That's really all there is to this card- layers. The stamp is another Quietfire Design beauty from the Bookmarks collection. The card stock is all Stampin' Up! and the dies used are Spellbinders which I bought from Quietfire Design.
While sorting through some boxes, I came across this tag/ornament that I made a couple years ago. Another combination of Quietfire Design stamp and SU! product. I think the flourish is a Magenta stamp. Don't you just love the "oh Santa...."?
 
Thanks for looking today. I appreciate you stopping by.
Have a fantastic day and flex some creative muscle.


Wednesday, November 7, 2012

THREE TO SHOW

I want flat, easily mailed cards this year and today's offerings fit the bill.
When they go together quickly too, that's a bonus.
This one would be easy, peasy to make multiples of.
 
Thanks for looking!


Tuesday, November 6, 2012

CHRISTMAS CARDS

It's that time again- past time almost.
Time to get going with the Christmas cards.
The die and embossing folder are from Stampin' Up!
Here's a couple to check out- more tomorrow!
The ornament die and holly stencil both came from Quietfire Design.
 
Have a wonderful day!


Thursday, November 1, 2012

ONE LAYER SAMPLES

After some chit chat with some design team friends, I was inspired to play with this masking technique. One is random stamping over the edge of a scallop circle punch out-Noel. The other is stamped more evenly using a marked circle punch out, and then randomly stamped red flakes-joy.
Robyn mentioned Burnished Velvet, a glitter technique and so that had to go the sample as well.
This is the scallop punch out after the stamping and sponging was done. The 'berries' are fired brick ink mixed with a little sparkle paint and dotted on with a stylus.
This shows the set up for the 'joy' sample. The lines on the circle are the guide to line up the center of the stamp, which is marked on the acrylic block. The green masking tape shows me how far to ink up the stamp so I just get the flourish inked and not the star. This would work well with an oval shape too. Any shape you like.
The stamps and inks are from Quietfire Design.
 
Just an idea for making a single layer card which goes through the mail easily.
 
Thanks for looking and I hope you give it a try.


Tuesday, October 30, 2012

COLOUR Q TIME BABY!

It's been awhile since I played at Colour Q so tonight was the night. :)
One of my lovely nieces recently had her second baby and I need a card. Lots of faux stitching, sponging and shadow stamping make up the techniques used, with a few punches and dies for shapes.
Easy peasy but baby cute!
 
Thanks for stopping by and have a great day!
 

TESTING 1,2,3...........


A quick post to show Heat 'n Stick powder and glitter, along with pigment inks and glitter embossing powders. Apples to oranges a bit, but you get the idea.
 
My fave is the H&S and glitter!