Welcome!

This is my place to share my creative bits and pieces. My art has no rules, no limits and absolutely no order. My projects change with my moods but for the last few years, my main focus has been paper art. Cards, collage, mixed media and as many techniques as I can get to. My inspiration comes from everywhere.

I hope you enjoy your visit.


Friday, September 28, 2012

THE FLIP SIDE

I just wanted to show you the revised card. I added some flags and bling. Then, I flipped over the
M-Bossibilities folder and did the same technique using that side.
This such a fun technique!

My post is up over at Quietfire Creations so please go have a look. Here's a teaser....
Go see what the other designers have been up to as well, if you haven't already.
 
Have a great weekend and thanks for stopping by!


Thursday, September 27, 2012

FRIENDSHIP.....PRICELESS

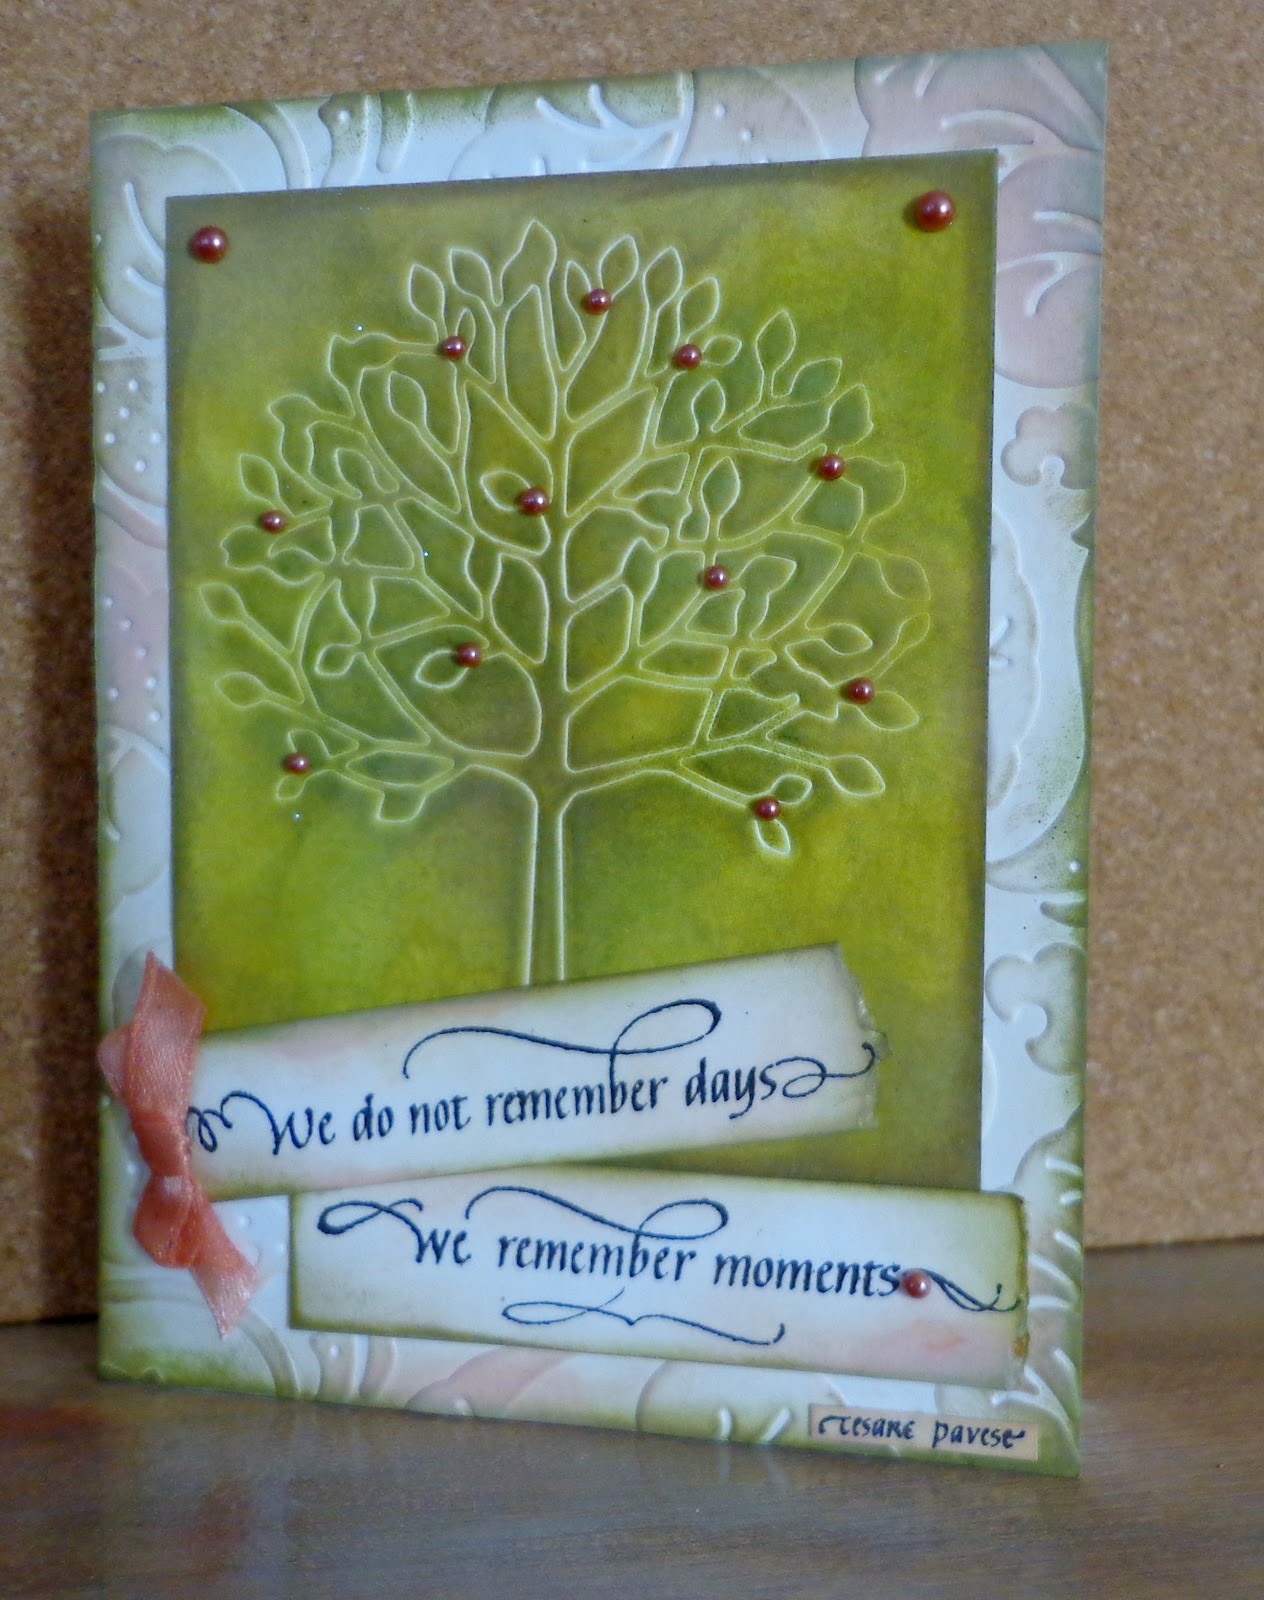
My DH and I have always known how blessed we are with the friends we have. We've reached an age where life has proven many times, how important friends are to us and 'who' they are. This beautiful sentiment from Quietfire Design sums it up perfectly. We hope we've been a sheltering tree for others.
The technique here is Embossing Folder Print and it's so easy. Inks are dabbed onto the folder after you decide which side of the folder you want to use. I use my art journal to do test stamps so I can choose my end result. Once inked up, a light spritz of water moves the inks a touch. Then you lay the card stock over it and smooth it all over with your hands, or a brayer or an acrylic block or your bone folder.....you get the idea :)
For this card, I gave it a little spritz of walnut ink as well, then completed the card. I think it needs a little something in the top right corner. What do you think? I have bling or a small pennant could go there, or a button. Or nothing at all? Let me know.
 
I hope you have steadfast sheltering tree friends in your life and that someone thinks that of you. As I said....priceless.
 
Have a fabulous day and thanks for looking!


Tuesday, September 25, 2012

CLEAN UP CARD

While cleaning up my work table, I came across a handful of cut off strips in various shades of blue. I stuck them down, butting them against eachother, then used a hexagon die to cut them out. I added a couple white pieces and after embossing, attached them all to the card front.
Fewer scraps to throw away and a fun card- win/win!
 
Have a fabulous day and thanks for looking!

Monday, September 24, 2012

WELCOME FALL!

The colours of autumn- comfy, toasty and vibrant. Then, I go one step further and add a little shimmer.
 
I used a gold stardust gelly roll pen to outline the stamped design. That's the shimmer, but there is more going on here. The stamp is a die-cut fun foam background stamp made with a Spellbinders botanical expandable die. I stamped on white cardstock, let it dry and I brayered inks over it. Then I followed up with the gelly roll pen. The actual stamp (die) is more than twice the size of the strip you see here.
The friend sentiment from Quietfire Design was stamped with Versamark ink and embossed with espresso embossing powder. The little leaf is perfect for fall and got a little gold sparkle too.
Again, hard to photograph because of the shimmer, the sunshine and the photographer. :) I must have taken 30 shots of this card and this is the best of them.
 
This card is dedicated to my wonderful friend Karen. Fall is not her favourite season- she is a Spring girl! However, she knows I like Fall and she loves me anyway.
 
I hope you are enjoying your day and thank you for dropping by.


Saturday, September 22, 2012

3 DOWN, 1 TO GO & REDUX

We took a little trip out of town this week and DH came home sporting this ink on his arm. Cool huh? I got my little tattoo in April, remember this?  Our youngest son got his last year, so we have one son left. He's inkless :) This is the boy who at 15, wanted a tattoo in the worst way. So, I'm guessing it's only a matter of time before the whole family is inked.
 
No plans whatsoever for more- they hurt!
 
Thanks for sharing this little bit of family fun with me.
Now, back to cards.......
Remember the watercolour whimsy card and how I said I wanted to try it on cardstock instead of vellum? Well, this is the result.
I like it this way too but it loses the wrinkly look which I really like. 
So, like all techniques- go with what you like, when you like it.
 
Happy Fall!
Thanks for stopping by!


Thursday, September 20, 2012

'ROUND & 'ROUND

This beautiful sentiment comes from Quietfire Design. 
Watercolour Re-inker is the technique behind the words and it's one of those fun, messy ones. On a non-stick surface, place a few drops of dye ink. Add a few drops of water to each puddle of ink to allow the different colours to meet and slightly blend. Lay the white cardstock on top of the mixed inks and let it sit until you see the colour coming through. Lift off and repeat until you have the result you want. Once dried, I stamped the words, then spritzed with dark pink and silver pearl. The flowers were punched from this cardstock as well. The spirelli was done with a silver cord and attached with foam tape.
I hope you like this card and feel inspired to try any of the techniques used here.
 
Thanks for looking and have a fantastic day!


Tuesday, September 18, 2012

THANK YOU- STACKED

Hi! Today I have a card that has lots of pieces, like a puzzle. The background is Embossed Puzzle, a new technique from Technique Junkies. The 'thank you' is a stacked design using die cuts that have been cut in half, then layered behind. Rather bold looking.
 
Thank you for stopping by!


Sunday, September 16, 2012

BUTTON & BOW

I had no idea that black picked up so much light. No flash was used- I try to never use it for cards- but enough light in the room reflected off the black.  The technique here is called Water Colour Whimsy and uses vellum.
You can see from the sample card that it's easy to do, just messy. I love messy! I want to try this on reagular white cardstock, maybe black too, and see how it looks. Is it the WC paint or the vellum that gives the luminosity? Stay tuned.........
 
Enjoy your day - it's a beauty!
Thank you for stopping by.


Friday, September 14, 2012

GREEN MOSAIC CONVERTIBLE

Green mosaic convertible?
No, I haven't lost my mind but I don't blame you for thinking so :)
GREEN- re-use or recycling. You'll see how.....
MOSAIC- made with rubber scraps, leftover from trimming stamps, then glued to a small scrap of wood to make a permanent background stamp.
CONVERTIBLE- the narrow front panel can easily be removed from the card and converted into a bookmark.
Speaking of bookmarks, the stamp is from a set called Quote Marks. There are several sets and this stamp is from the Friendship set.
So, there you have it- green mosaic convertible.
 
Have a wonderful day and thank you for looking!
 

Wednesday, September 12, 2012

SHARING

You would think I'd been out of town again with the way I've neglected my blog. Just a funny week.
I have lots to share with you today and first is this card that uses a die to emboss. I had seen this done all over the blogosphere but hadn't tried it. My friend Jutta came over, handed me the tan mat and said something along the lines of "go for it!". How could I resist? Thanks Jutta! This tree is one of several we did that evening and while the results look great alone, I preferred adding inks for colour and stronger definition. There are times when the un-coloured version serves better as a subtle background or on a monocolour project.
I stamped the sentiment, then cut it up to provide a little interest to the card. You can find the tree die , the sentiment stamp and the embossing folder at Quietfire Design. 
 
Want to see more? Okay!
I was invited to join the Quietfire Design Team recently ( how exciting is that?! Thank you Suzanne!) and my first design team member post went live today.
Please go check it out.
Don't forget to look around while you're there. The other designers have created great things for us to see. You might want to bookmark it if you haven't already as there is so much more to come!
 
Thank you for stopping by. I love being able to share with you.
Have an amazing day!


Tuesday, September 4, 2012

FROST POP CHALKS

My sample card for this technique specifies Frost White All-Purpose Ink but you could use any shimmer ink or paint for the base. Even a brushed metallic card stock.
I was in the mood for purple when I made this card. The chalk design was created by stamping Versamark ink using a die-cut fun foam stamp. The sentiment is Quietfire Design.
 
Thanks for looking!


Monday, September 3, 2012

BACK TO REALITY

This is where we were standing last Wednesday. We arrived in Las Vegas Monday afternoon and ventured out the hotel in the morning to try to beat the heat. There is no such thing! Even at 9am it was 90' and hit highs each day of 100 to 104. However, we had fun anyway.
If you've been to the Bellagio then you recognize these flowers. If you haven't, these glass beauties are up to 20" across. They are stunning!
 
We were walking back to the Deuce bus stop and I spotted a sign that I thought was funny.
So, we are back, the laundry is caught up, the house is clean and I hope to spend a good part of the day in my art room.
 
I hope you've had a great week!
Thanks for looking.