Welcome!

This is my place to share my creative bits and pieces. My art has no rules, no limits and absolutely no order. My projects change with my moods but for the last few years, my main focus has been paper art. Cards, collage, mixed media and as many techniques as I can get to. My inspiration comes from everywhere.

I hope you enjoy your visit.


Friday, May 18, 2012

ROUND ONE

Once again Colour Q has come up with a great colour combo.Soothing colours and springtime too. So, in keeping with wanting to do techniques, I assembled everything to do Air Blaster Shine. Then, I made this card:
I know, right? A bit of a disaster! The technique was done correctly but nothing else was. So, I like the flower/leaves cluster. I really like the argyle punch. I don't like them together. The air blaster shine is done on glossy card stock with water, dye reinker and a spritzer tool. Or you could use canned air or a straw. I embossed with the stripes folder first because I wanted the ink to flow along the channels. Spray water all over the card stock, then drip on the dye ink, then push it around with puffs of air from the spritzer tool. Or canned air or straw. You can add a new colour or more colour by repeating the steps. Let dry or dry with a heat tool.

Even though I dislike this card, it shows the technique I wanted to share today so it serves a purpose. It also has become a challenge now, so I can dismantle it and try again.

I have since made a new card for the Colour Q but it must wait until morning.

Thanks for looking.


Thursday, May 17, 2012

ACRYLIC LAYERS

The copper acrylic paint was still on my work table so I painted a layer of it onto the card stock. Once dry, I brushed on a layer of green acrylic paint. When completely dry, I ran it through the Big Shot in an embossing folder. I used the sanding block to take off green paint and in some areas it also took off the copper. I like the look. I stamped the sentiment with black stazon, then assembled the card. Using my stylus (the end of the paintbrush works too) I placed dots of copper paint on the flower centers.
Acrylic layering offers a lot of experimenting. Apply more layers of paint before embossing and sanding. Paint, emboss, sand, paint, change to a different embossing folder and emboss, then sand.
Here you can see the copper dots and the sentiment.


Just play and try different things.
I hope you have a wonderful day!

Wednesday, May 16, 2012

3-D BEFORE A

I have a box filled with cards and each card has a technique on it with directions. It has been years in the making and I'm pleased as punch to have it. While going through my stamps and marking the retired sets with a big red sharpie, I noticed that there are sets I've had for some months now that have never seen ink. Crazy!
So, I decided it was time to break out the unused stamps and start working through the technique box. I am challenging myself to use either a technique from the box or a previously unused stamp set- one or the other, or both, on any card for the rest of the year. I think I can do it, in fact I have already begun. The acrylic-acetate card from yesterday- that technique came from the A section of the box.The technique card in front of that was the 3-D technique which should have come before the A. Now I've decided to not worry about precise order and just do them.
The flower on this card is 3-D because it is stamped several times, different layers are cut out and they are stacked using foam tape between the layers. Like paper tole, only simpler.
Hopefully you can see the three layers better in this photo.
Give it try and layer something.
Do you have any challenges of your own? Would you like to join me in mine? Play along and I'll post your results too, if you like.

Have a wonderful day and may all your stamps be inky (in a good way)

Tuesday, May 15, 2012

ACRYLIC UNDER ACETATE

With this technique, the acrylic paint is acting as a colorant and a glue. It's easy peasy- here's how.
Use Stazon ink to stamp your image onto the acetate.
Brush a generous layer of acrylic paint onto the back of the acetate or onto the card stock you'll be placing the acetate on. You are using the paint to stick the acetate and card stock together. Put the two pieces together and set aside to dry. When dry, you can trim it, mat it and use it.
*Do not try to speed the process by using a heat tool from the paper side, although if you do and it warps, put it in an embossing folder and run it through your machine. ;)

Just play and have fun!

Monday, May 14, 2012

CASCADING IMAGES

The stamped leaves were masked, embossed with Distress embossing powder, then cut out and attached to the card. Less bulk on the card and less cutting out this way. The black card stock was coloured with Pearlex and Future Floor Finish before stamping the leaves. An old technique but timeless.

Have a wonderful day and enjoy the beautiful sunshine!

Sunday, May 13, 2012

A 'SORT OF' EGYPTIAN NECKLACE

My friend Julia loves all things Egyptian, so I attempted to create a necklace for her with an Egyptian flair.
The curve is similar to a collar without being one.
She was pleased with it so I am happy.
I see now that I really shouldn't have taken the photo of it against a wine coloured fabric. I learn so much with this blog o' mine.

It has been a gorgeous weekend and I hope you all got to enjoy it.

Thanks for looking!

Friday, May 4, 2012

BIG SHOT STAMPS

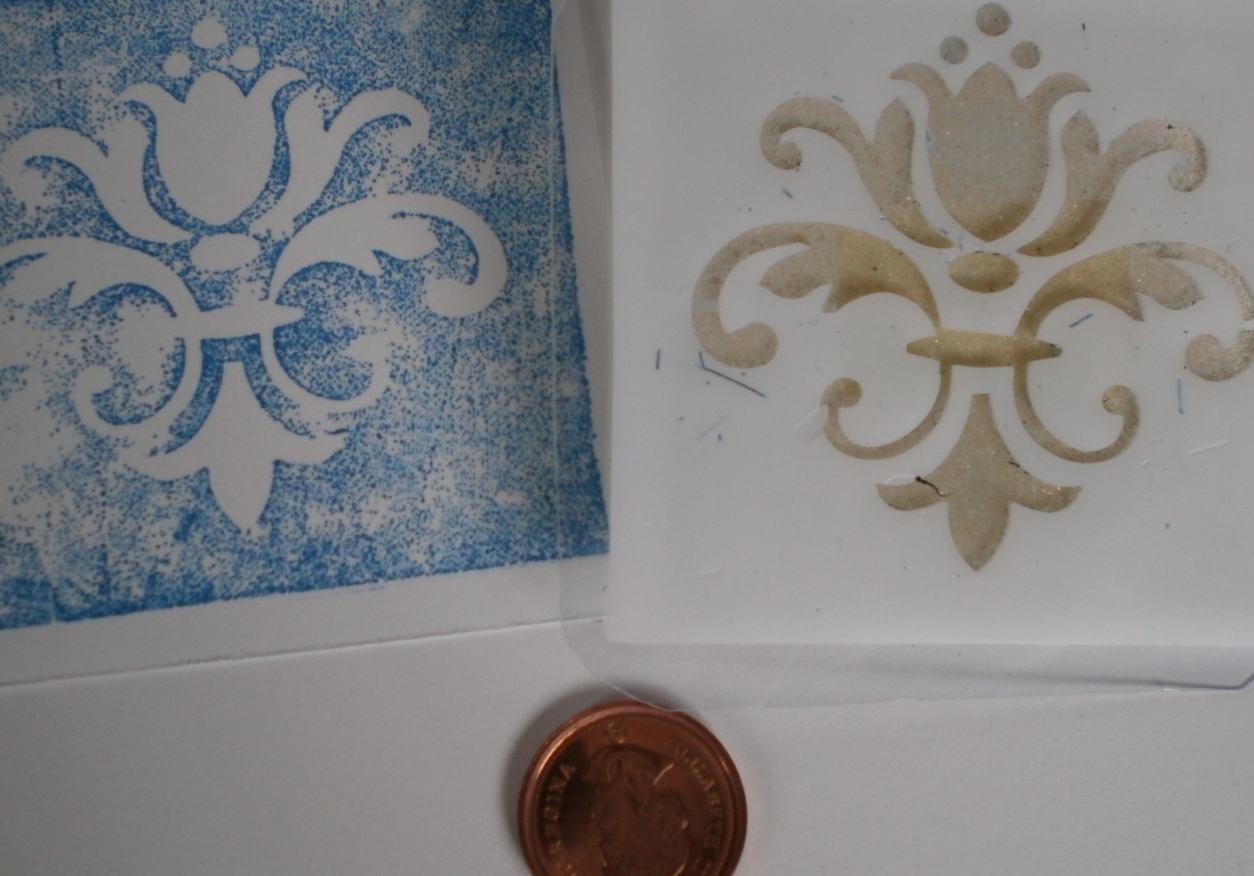
I was busy with the Big Shot today, making stamps or maybe they should be called printing blocks. I think of stamps as being flexible, cushion-y. These are not. The green die-cut is actual size of the die. The blue ink print is the new stamp. That's what happens when you die-cut shrink plastic!
Here are more samples-
Same die as green foam above.
Card stock attached for a handle, then I realized I could just do this-
 fold the corner of the heavy plastic that I attached the shrink plastic to.

One of my favourites.
Some packages of the shrink plastic report 40% shrinking from the original size, some say 20%. All I know is that it goes pretty small while keeping uniformity of design.

This allows for actual die-cuts being used, along with a die-cut foam stamp and then the smaller print blocks. Now all I need to do is create something with all this.  :) Maybe tomorrow.

Enjoy your day!