Welcome!

This is my place to share my creative bits and pieces. My art has no rules, no limits and absolutely no order. My projects change with my moods but for the last few years, my main focus has been paper art. Cards, collage, mixed media and as many techniques as I can get to. My inspiration comes from everywhere.

I hope you enjoy your visit.


Friday, January 21, 2011

SPIRELLI ANYONE?

And now for something a little different......
Spirelli, a fun name for a fun technique and doesn't it remind of Spirograph? Remember Spirograph?
Anyway, a bit of thread, crochet cotton or any fine cord can be used. I warn you, Spirelli can be addicting. You will not stop at just one, trust me on this.
THIS LINK  will take you to a website that has a PDF for you to save or print. I think it's very well done. There are lots of videos on youtube as well, just go to Google or youtube and search SPIRELLI.
Here's a look at my sample card- just a few of the possibilities.

I hope you try this.
Thanks for looking and have a super day!

Thursday, January 20, 2011

ONE MORE...

Hearts. Again. Inlaid embossing. Again. Hmmmm....
I seem to have been on a bit of a roll with this. Enough now. Really.

Wednesday, January 19, 2011

STAMP SCRAPS

This quick little card would be perfect for a young boy but that's not the focus of sharing it with you. See the piece that Happy Birthday is stamped on with a kind of a green camoflage look to it? It was made by stamping with scrap rubber. After you push out the stamps, you're left with odd shaped rubber scraps. I took a couple and trimmed around a bit, then inked them up. Great for backgrounds!
Here's another sample with the same scraps.....
Fun huh?
So look at your rubber scraps. Keep in mind that you can die-cut shapes from the rubber too. I'll show that another day.
Have fun and enjoy your creativity- however you express it!

Tuesday, January 18, 2011

WITH ALL MY HEART

Yes, inlaid embossing again. I love how the hearts on the right side look when done this way. The hearts on the left side, were embossed, then adhered using foam tape to lift them off the card. So, on one card, the contrast of inlaid and raised hearts.
(I think I'm getting tired of hearts)

Monday, January 17, 2011

SANDED EMBOSSING

Just dab ink onto glossy cardstock. Get it on there any way you like; smoosh the ink pad directly, use sponges, solid stamps ot the acrylic block itself. That's what I did with my first two lighter colours. The third and darkest colour I added with a sponge, just a bit, here and there. Then, emboss and sand. If you sand too far, just add more ink and sand again. You can't mess this one up, can't do it wrong and can't help but enjoy the process. At least, I hope you do.

Take a minute and give it a try today. :)

Sunday, January 16, 2011

EASY WATERCOLOUR

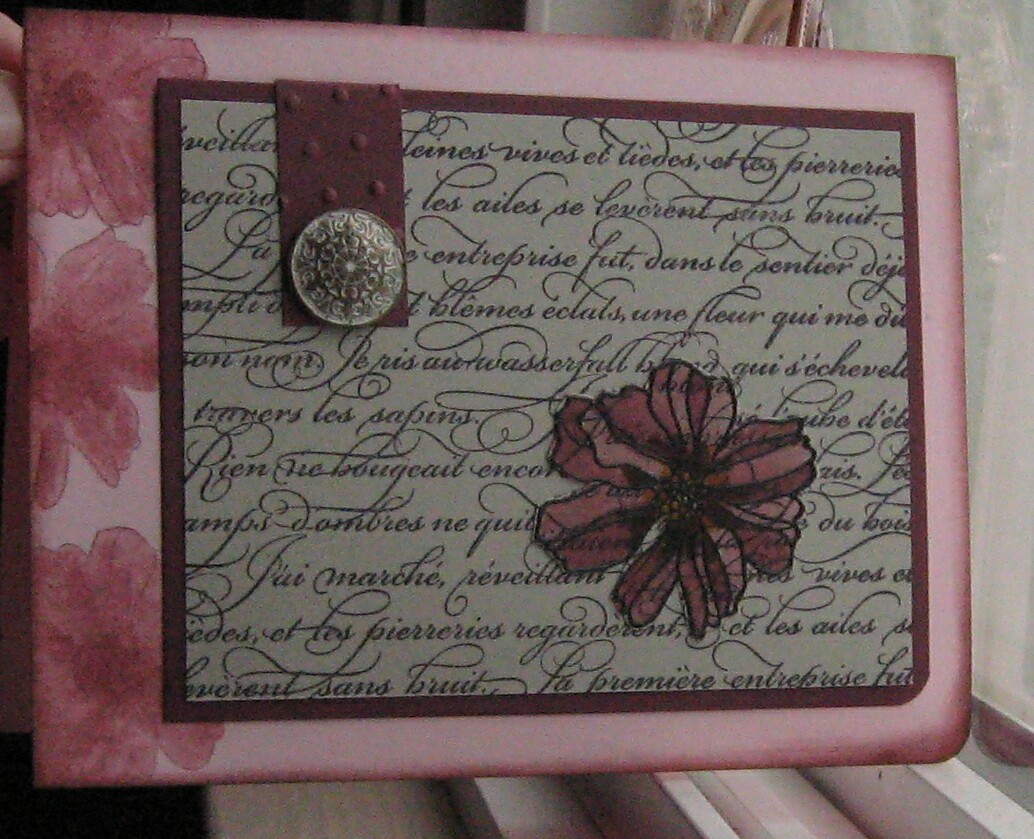
Nothing fancy here at all, just a bit of watercolouring with the aquapainter. It's a brush with a barrell on it that holds water and it wicks down to the brush. Yoi pick up ink with the brush tip and apply it wherever you like. I did loose watercolouring with the flowers along the left edge, nothing precise. The black embossed flower has more specific watercolouring on it. The embossed line also helps contain the colour.

Thank you for your comments- I appreciate every one of them and that you take the time to leave them.
Have an amazing day!

Saturday, January 15, 2011

INLAID EMBOSSING BIRTHDAY

Inlaid embossing- a fancy name for a very simple technique. Most often, it's done with punched or die-cut shapes, adhered to a base layer, then run through the Big Shot in an embossing folder. This card uses strips of print paper instead of shapes and the embossing unifies it all. Give it a try, I know you'll like it.

Have a wonderful weekend!