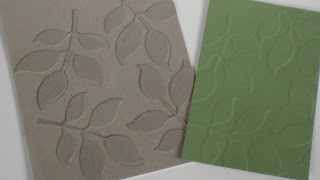
More recycling for you today. These homemade texture plates use chipboard from food boxes and any kind will work for you. Cereal, chips, whatever. For this one, I used the lattice die and cut one from the chipboard, glued it down to another piece of chipboard and let it dry. Then made the stack, including the silicone pad and ran it through my Big Shot machine. It embossed beautifully! Here's another...
Totally from scraps as I cut the scraps into triangles and glued them down. And....
I have one more to show you and it's a little different because it's using the negative (or frame) of the plate above.....
The resulting empbossed image is a little sharper when using the negative.
I hope to have finished samples for you soon but in the meantime, cut up those cereal boxes and make some texture plates for yourself- it's fun!
I'll post the website where I saw this first, once I find it again.
Edited to add: This is where you will see more samples and she has a very complete tutorial on these.
Hope you can find some playtime soon.


I like the subtle effect, thanks for sharing.
ReplyDeleteThanks for the link. Can you use these embossing images without a machine?
ReplyDeleteThese are wonderful! I love your gorgeous patterns and how you made one with the negative image. I find the biggest factor for how well it impresses is thickness of the cereal box. Have you tried spritzing with a little water? I find it makes all the difference (if your paperboard is sealed) :o) Thanks so much for the link & the inspiration to make more of these!
ReplyDelete